Digital Submissions Guide
| Update: 2/1/17
John Krygier | e-mail: jbkrygier@owu.edu | ...to krygier teaching page. | ...to krygier top page.
Using Less Paper in Class...
- Don't print the course syllabus or schedule. Check it online, or save a copy on your computer as a web
archive from your web browser. This saves the page and all the graphics as a file you can
view on your computer (even if you are not connected to the internets).
- Don't print the PDF readings. Try reading them on the computer screen. Or your phone. Or your tablet. Or your watch.
- If you want your own copy of the lecture notes, save them as a web
archive from your web browser.
- Submit digital exercises and take home exams. More on this exciting prospect below...
Software...
- Free software does everything you need in this class: I suggest you
use the Drive word processor associated with your OWU Google account. Drive,
can be set up to be accessible on and off-line. Better yet, you can share your work with
me without printing or sending a document by email.
- If Drive is too much of a challenge, you can also try the open-source Mac
and Windows Open Office
suite of software which includes a word processor, spreadsheet, graphics program,
presentation program, and database (installed on computers in Science Center room 207),
or the Open Office spin-off Libre
Office (Nerd note: OpenOffice was developed by Sun, which was bought out by
Oracle; Oracle is allegedly not as supportive of open-source software as Sun was,
and one result is Libre Office, sleeker and "more" open-source correct now than the
Oracle Open Office). Or just use Word. Aaak.
- Additional useful free software for graphics:
GIMP for Windows or its Macintosh equivalent Seashore.
- Need to convert one file format into another and don't have the right software? Text, images, even music and video? Try the
free Zamzar web site.
Digital Submissions...
For each exercise or take-home exam:
- Compile all text and graphics into a SINGLE file:
- Best: A Google Doc.
- 2nd best: .pdf (Portable Document Format - a "digital container" that can
hold most kinds of files and only requires a free PDF viewer to open and view)
- 3rd best: Open Office .odt file (or LibreOffice equivalent)
- 7th best: Microsoft Word .doc / .docx file
- Basic document format: 1 inch margins, 12 pt. type, space-and-a-half line spacing.
- Double-check that your submission is complete & in one document.
- Drive documents: named like this (but with your name and appropriate exercise or exam number): Krygier_Exercise_1
- PDF or Word or Open Office documents: named like this: Krygier_Exer1.pdf or Krygier_Exer1.doc or Krygier_Exer1.odt
- PDF or Word or Open Office documents: NEVER EVER remove the file extension (.pdf or .doc or .docx). For Google docs don't worry about it.
- Use an underscore ( _ ) rather than a blank in file names.
- Your file should be completed no later than 10 am on the due date (or earlier if specified).
- Email me when your exercise/exam is done and make sure I respond indicating I can access and read your document.
- All the above are comprise basic digital literacy, well worth your time to master in
this golden age of computers and the internets.
- Please let me know if you need help.
Creating a document in Drive and sharing with your instructor
Google Drive, of course, saves your work in the clouds of the internets,
where you can share your work with me (or anyone else). The well-paid engineers at Google
are responsible for backing everything up, so we are, it seems, freed from the burden of
digital files on laptops or desktop computers, in email accounts, on flashy drives, etc.
In a clamshell, you will copy your finished document to your OWU Google account and give
me the ability to view and/or downloads it to my computer.
- log into your OWU email account on the web
- click on Drive
- click on New then select Folder
- give it a name just like this but with your name: Geog_222_Krygier
- please put course first then yer name - it helps me keep all the folders organized by class and student name on my side of things.
- right mouse click on the folder and select Share...
- under share with others enter my email address: jbkrygier@owu.edu
- set the pop up to the right to Can Organize, add and edit then hit Done
- Now everything you save in this folder, or upload to this folder is visible to me from my account!
(be vERy careful about what you put in that folder).
Whilst within your shared folder for Geog 222, click on the New button. Select Document.
You can also create spreadsheets, presentations (of the Powerpointy variety), graphics, etc.). Cool!
Name your document thusly: Krygier_Exer1 (changing name, exercise or exam number, of course)
You can type stuff in now: saving is automatic. Please explore the option to Install Drive for your
Computer (bottom left of main Drive page). This installs a bit of software which creates a folder
or directory on your computer with all your Drive stuff. You can set this up so you can work on Drive
documents while off-line (if you don't have internet access).
It is worth your time to learns how to do this exciting stuff: Use your brains and I bet you
can figure out what you need to. Or, let me know and I will be happi to halp.
The following information is organized assuming you will...
- find graphics/maps on the web or have a paper copy of the graphics/maps
- save the graphics/maps as a digital file
- create a digital document and share it on the web
- insert the digital files into your document along with text
- make sure (email) I know when your document is complete, and respond that I found it
Graphics: Getting graphics off the Web
Most of the exercises and take-home exams in this course require finding or making maps on the web.
This means familiarizing yourself with how to get graphics from the web and into your documents.
Most of you are familiar with graphics file formats like JPG and GIF and PNG. To keep
things simple, stick to these basic file formats. Other formats may also work, and
feel free to experiment if you want to.
Always document the source of any image or map you save from the Web. See
Citing Maps you use in your submissions.
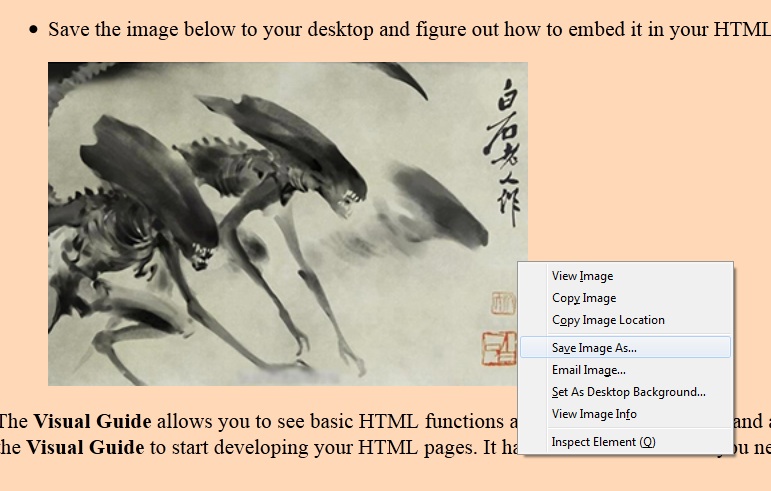
Windows Option 1: Click and drag the image to the
computer's desktop. Or right-mouse-click on the image: from the
pop-up window select Save Image As.... If the file is one of our
basic file formats (JPG, GIF, PNG) it will have the file extension .jpg
(or .jpeg), .gif, or .png.

- Navigate to and save the file
somewhere you will remember. If using the GIS Lab computers, save it in the
Geog 222 folder on the C drive, in a folder with your last name on it.
- When I do this the file does not have a file extension! This can
be for many reasons: best to use Windows Option 2 (below).
- When I do this the file extension is weird! You can look up file
extensions here, but if it isn't one
of the basic file formats it is best to use Windows Option 2 (below).
- I don't see the file extension at all! This may be Windows
trying to help you and instead making life hard for you. You need to adjust
Windows so it shows file extensions. Find Folder Options in Windows:
Start >> Settings >> Folder Options, then select View from the
options at the top of the window, and un-check the box next to the
text that says "hide file extensions for known file types." Hit the
Apply button and you should be able to see the file
extensions.
- Windows Option 2: Print Screen: This works with all
Windows computers.
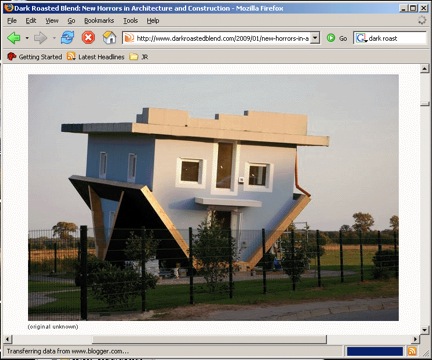
- 1. Get your map (or graphic) in a browser window, so you can see all
of it, but not any extra stuff around it. Move the cursor is off the map and close
or minimize other windows.

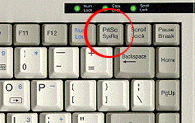
- 2. Simultaneously hold down the ALT key + PRT SCRN key on the
keyboard for a few seconds. This captures all the graphics in the foremost window. [On
some computers, you must hold down the FUNCTION + PRT SCRN key]. You can also just
press the PRT SCRN key: this copies everything on the computer screen.

- 3. Open Paint (included free with
Windows), and usually found in the Programs >> Accessories folder.
Create a new document then Paste and Save as a JPG,
GIF, or PNG somewhere you will remember. If there is excessive junk around
your map/graphic, select just the area you want, then select the crop command.
Your saved file can be
brought into Word (with the Insert menu).
- 4. It is possible to directly paste a PRT SCRN image into Word,
or right mouse click and copy from the web, then paste into Word. Don't do it!
This tends to create a really large graphic, and can make your final
document way too big. If you do this, once the map is in your document,
double click on it. Under the Picture tab is a button
Compress. Click this, then from under Change Resolution select
Web/Screen. This should compact your pictures so that they look good
on the screen but are not too big.
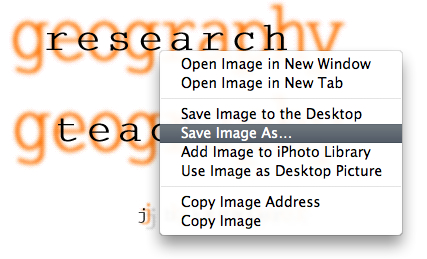
- Mac Option 1: Click and drag the graphic to your
computer's desktop. Or, if you have a two-button mouse,
Right-mouse-click on the image. From the pop-up window select Save
Image As.... If the file is one of our basic file formats (JPG, GIF,
PNG) it will have the file extension .jpg (or .jpeg), .gif, or
.png. Navigate to and save the file somewhere you will remember.

- When I do this the file does not have a file extension! This can
be for many reasons: best to use Mac Option 2 (below).
- When I do this the file extension is weird! You can look up file
extensions here, but if it isn't one
of the basic file formats it is best to use Mac Option 2 (below).
- Mac Option 2: Print Screen: This works with all Mac
computers.
- 1. Get your map in a browser window, so you can see all of it.
- 2. Simultaneously hold down the COMMAND key + SHIFT key + 4
key on the keyboard. A cross-hair cursor appears on the screen.
- 3. Move the cross-hair cursor to the upper left corner of the
map, click and drag to the lower right and release the
mouse button. A graphic file, in PNG format, will be created on your
desktop.
- 4. You can view the image in the Mac's Preview application and
save it as a JPG or GIF if you want.
- 5. Open your word processor and import the
image.
Graphics: Scanning paper maps & graphics
The easiest way to get a digital copy of a paper document is using your phone.
Find an app that is designed to generate readable copies of paper documents. I
use Scanner Pro on my iPhone (but there are many other options).
As an alternative, the AV Center in the basement of Beeghly Library has a scanner
and staff to help you use it. Check the Media Center hours before you go.
In addition to the basic graphic file formats (JPG, GIF, PNG) you must be
familiar with file size when scanning paper maps. File size refers to the
dimensions (length, width) as well as the resolution.
Scanning software packages and scanners have many options, a few are important
for our purposes:
- Dimensions: typically just scan at 100% of original. You
can often scan a smaller (say 80%) or larger (say 130%) file of your paper
map.
- Color: most scanners offer options for scanning color photos,
black & white photos (grey scale images), and line drawings. Use the
setting for photos, scanning in black & white if your original is black &
white as the file size will be smaller.
- Resolution: IMPORTANT: You will be tempted to scan stuff at
too high a resolution: this creates files that are way bigger than you need, and
will make working with and uploading your file a pain in the keester. The resolution of the scanned file refers to how many dots per
inch the file contains. The higher the resolution the better the quality, but the
bigger the file. If you are going to use a scanned image on a computer screen (a web
page, blog, or PowerPoint presentation) scan it at 100 or 130 dots-per-inch. If you
are going to use a scanned image to print scan it at 200 to 300 dots-per-inch. For
Geography 222 scan your maps at 150 dots-per-inch. This looks pretty good but the
files are not too big.
- Orientation: if your scan is upside down, please find the tool in
the scanning software to flip it to the correct orientation.
- Scan your map and save the file somewhere you can find it. Then import
the image into your document.
Back-up Plan: If you are unable to use the scanner for some reason, an alternative is
to take a photo of the map with your cell phone. Not optimal (usually somewhat blurry)
but better than nothing.
Inserting Graphics in your Word Processor Document
Inserting graphics in a Drive document is easy as long as you know how to do it and
do it correctly. When in a Drive document, click the Insert menu, then select Image
and either drag and drop your image, or navigate and upload it. That's it! Don't just
paste an image copied from the internets - that can cause problems (sometimes Drive tries to
link to the image on the web, and the image does not show up properly).
Once you insert the image, and it is on the screen, click once to select the image. Grab
the blue box in a corner to scale the image so it is a reasonable size. You can also experiment
with inline text (wrapping text around the image) options that pop up when an image is selected.
If you are really set on going old-school and using Microsoft Word or OpenOffice the procedure is somewhat similar.
Windows, Word: get your graphics in order:
- Under the File menu, select Options then Advanced then
Image Size and Quality and make sure the setting is 150ppi. Anything
more will make a bloated file. If you need to create a high quality document for
printing, change the PPI to something higher - like 220ppi.
But don't do this for this class!
- Open Word and under the Insert tab select Pictures.
Navigate to your file and select it.
- Don't cut and paste graphics into Word. Use Insert instead.
Cutting and pasting creates larger files.
- Don't insert graphics upside down! Right-mouse click on the image, select
Size & Position, then Rotate.
- Click once on the graphic. You can grab the corners and scale
it to fit on the page.
- Double-click on the graphic. A bunch of options appear on the menus above. Feel free
to experiment to improve your graphic. For example, you can crop your image.
Mac, Word: get your graphics in order:
- In the Home tab, under Insert select Picture then
Picture from File. Navigate to your file and select it.
- Click once on the graphic. You can crop, rotate, and do other exciting
stuff to your graphic. Make sure the graphic fits on the page, is not rotated, and does not
have lots of junk around it. Fix your graphic if need be.
- When all your graphics are inserted, Click once on the graphic. Select
Compress from the menu, and change the setting to Best for Viewing on
Screen (150ppi). Make sure the Apply to: All Pictures in File option
is selected.
Open Office: Try and figure it out, or ask me!
E-mail: jbkrygier@owu.edu
...to krygier teaching page.
...to krygier top page.
OWU Home
OWU Geology and Geography Home


