Geography 353 Cartography and Visualization
...to Geog 353 Main Page and Course Description
...to Geog 353 Syllabus
...to Geog 353 Course Schedule and Lecture Outlines
...to Geog 353 Laboratory Information and Student Projects
Geog 353 Lab 9: Cartographic Animation
Update: 12/5/12
- 100 points
- ASSIGNED: Monday December 3
- DUE: Wednesday December 5
Lab 9 Goal: In Lab 8 you exported scads of maps and associated
legends from ArcGIS, and converted them to GIF files. You paid careful
attention to the final size and graphic quality of the maps. The next step is
to animate your maps, using Ulead GIF Animator, to create GIF animations
for the web, Arc2Earth to create KMZ animations for Google Earth, and one
other method of presenting your maps & data (which you figure out on your own).
Details:
First, a bit of background on map animation...
- "In the motion picture lies a highly essential but much
neglected field for pictorial statistics. Newsreels, war films and such
features as "The March of Time," McCrary's "Ringside Seat" or "Kaltenborn Edits
the News" occasionally incorporate maps, but usually they are either globes or
maps clipped from newspapers and similar sources. But the screen offers the
best imaginable opportunities for "dynamic" visual information. On the screen
arrows can really move as opposing armies advance or retreat, statistical
columns can grow or shrink, frontiers can be violated and empires can literally
"crumble." The effect created by such "living" maps and graphs can be further
heightened by an effective accompaniment of words or music. One could both see
and hear a "frontier" "break down," the tramping "men" in the statistical column
"join the army," "the whistling ships" slide down the ways and the like. Why not
include such a map feature, dynamically illustrating current war events, in the
newsreels? Why not visualize the growth of line-lease aid, the progress of the
war-bonds campaign, in pictorial statistics that move? Why not portray
Germany's exploitation of the occupied countries by maps on which the
confiscated goods actually march into the Reich? Or depict the effect of air
raids, swarms of planes (in symbols) dropping bombs across a map of strategic
and key industrial points? Why not dramatize the unrest in Nazi-occupied Europe
by flashing on a map those places where hostages have been executed, troop
trains have been derailed, underground papers have been secretly edited and
printed. These few suggestions indicate how great can be the improvement in the
techniques and therefore the effectiveness of visual means for conveying
information about the war. (Heinz Soffner. "War on the Visual Front." The
American Scholar 11:4, 1942. pp. 465-476. Quote from page 476-77)
This multimedia extravaganza envisioned by Soffner in 1942 was suggested
by the need for war-time propaganda. What is interesting is that there is a
clear sense that adding a dynamic component to maps will "enliven" them and make
them more effective.
Animation can be defined as "...a dynamic visual statement that evolves
through movement or change in the display. The most important aspect of
animation is that it depicts something that would not be evident if the frames
were viewed individually. In a sense, what happens between each frame is more
important than what exists on each frame."
Animation works because the eye-brain mechanism retains, for a fleeting
instant, images of objects it has seen after the objects have been removed. If
the eye is shown a series of static views of objects at a rapid rate (30 per
second) with the objects changing positions only slightly from frame to frame,
the illusion of life like motion - animation - is created in the mind.
A Short History of Animation
- suggested in 1824 by Peter Roget: "The persistence of vision with
regard to moving objects" presented to the British Royal Society.
- 1831: Dr. Joseph Antoine Plateau and Dr. Simon Ritter constructed a machine
called a phenakistoscope which produced an illusion of movement by
allowing a viewer to gaze at a rotating disk containing small windows behind
which was another disk containing a sequence of images. When the disks were
rotated at the correct speed, the synchronization of the windows with the images
created an animated effect.
- 1887: Thomas Edison started research work into motion pictures.
- 1896: Thomas Armat designed the vitascope which projected the films
of Thomas Edison; this machine had a major influence on all subsequent
projectors.
- 1906: J. Stuart Blackton made the first animated film called
'Humorous phases of funny faces'.
- 1909: Winsor McCay produced a cartoon called 'Gertie the Trained Dinosaur'
consisting of 10,000 drawings.
- 1913: Pat Sullivan created an American cartoon series called 'Felix the
Cat'
- 1926; Lotte Reiniger produced the first feature-length animated film
called 'Prince Achmed'.
- 1928: Walt Disney created the first cartoon with synchronized sound
called 'Mickey Mouse'.
- 1957: John Whitney used 17 Bodine motors, 8 Selsyns, 9 differential gear
units and 5 ball integrators to create analogue computer graphics.
- 1964: Ken Knowlton, working at Bell Laboratories, started developing
computer techniques for producing animated movies.
- Computer animation software for desktop computers developed in the 1970s,
and the WWW has made animated graphics available to a broad audience of users.
The creation of animations for the WWW is easy, in large part due to the GIF
graphic file format.
1. GIF Animations: Animation for the People or Scourge of the Internet?


Non stop gif animations at SeñorGIF or
GIF Museum
GIF is a common graphic file format, and are one of the primary graphic file
formats used on the WWW (along with JPG). One interesting characteristic of GIF
files is that they can have layers and thus you can put multiple GIF
files into a single GIF file (one file on each layer).
When a GIF file with layers is viewed on the WWW it flips through the layers one by one:
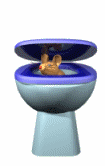
thus you can use GIF files to easily create animated graphics for the WWW. You have seen
annoying animated advertising banners, mail-box icons with the mail-box door opening and
closing, spinning globes, etc. throughout your lives. All of these amazing and dazzling
and often annoying animated graphics are created using GIF files.
Stare at the animations (above) for a moment, then ponder the annoyance factor
when experimenting with GIF animation for your project.
The hug advantage of GIF animation is that no special browser plug-ins are
needed to view the animations (even the oldest computers with out of date browsers can
show them quickly) and they are easy to create with free or low-cost software. Using
software (like GIF Animator) you can set the order of the files, set
transitions, effects, delays, etc. You can also copy existing animated GIF files off
the WWW, and, in many cases open them in GIF Animator and modify them (eg., make
the earth spin the wrong way - posh!).
Each of you will create at least four GIF animations:
- Graduated Color (Choropleth) map of population change in your state(s), 1900-2010
- Graduated color (Choropleth) map of population change gains and
losses (a 2 class map), 1900-2010. You will have to go back to ArcGIS and create a
new classification (2 classes, split at 0), export, and animate the files.
- Graduated Symbol map of total population in your state(s), 1900-2010
- Dot Density map of total population in your state(s), 1900-2010
You will find a copy of Ulead's GIF Animator installed on your computer (there
should be a shortcut on the desktop, or look on the C drive, program files, under GIF
Animator or Ulead). Use the online help files to learn how to import your GIF
files and animate them. Copies of the manuel, el papel style, are stacked neatly
near the instructor's computer. Please document basic step by step instructions for using
GIF Animator in your lab log! Note interesting effects or capabilities you
discover!
Hint: check out web-based gif animation tools such as
MakeAGif or Gickr or
Picasion or GIFSoup
(which turns YouTube video clips into animated GIFs). The web-based applications typically
don't have all the features of desktop software like GIF Animator.
Hint: you can use GIF Animator to create slide shows of
pictures - which is a more compact way to show images of your state or states
than having a page full of photos. You may think of other creative ways to
use animated GIF files in your project.
2. Arc2Earth: Generating Animated KMZ Maps for Google Earth
The Arc2Earth software is ONLY on the instructor computer in the front of
the room: Please watch your time on the instructor's computer, as everyone needs
to use it to complete the KMZ exports.
Please don't expect to be using Arc2Earth in class on the day we present our final
projects. Dopey pins have done this in past semesters!
Arc2Earth is a plug-in for ArcMap that allows you to export map layers as
KML or KMZ files (KMZ is a compressed KML file; both work the same). KMZ files
can include temporal data, and if done right, will produce animations. We will
create two KMZ animations: one your classified choropleth map, and the other the
gains/losses map (noted above).
Each of you will create two KMZ animations for Google Earth:
- Graduated Color (Choropleth) map of population change in your state(s), 1900-2011
- Graduated color (Choropleth) map of population change gains and
losses (a 2 class map), 1900-2011. You will have to go back to ArcGIS and create a
new classification (2 classes, split at 0), export, and animate the files.
2a) Open your .mxd file that contains your two choropleth maps.
- Under the File menu select Document Properties then change
the setting to Store relative path names to data sources and hit OK.
This setting means that all files (.shp, .dbf, etc.) used by and linked to your
.mxd project file will be linked in relation to your .mxd file, rather than
linked from the top directory of your particular computer. In other words, it helps
you move and open your project on a different computer.
- Save As... and give the file a new name, like Ohio_Google.
- Delete all but your two choropleth maps (each should have 12 layers). Save.
- Using Save As..., create one .mxd file for each of your two
choropleth maps (named something like: Ohio_Google.mxd & Ohio_Google_gainloss.mxd)
- Organize the layers from oldest to newest, so 1900-1910 is at the top of the list.
Save
- Turn all the layers on.
Weird File Mayhem in ArcGIS: You may have noticed that ArcGIS is
complicated when it comes to the files that comprise any ArcGIS project. There
is your project file, .mxd, but also a series of files for single shape file
you use in your project. These files typically are: .dbf, .prj, .sbn, .sbx,
.shp, .shp.xml, and .shx. If any of these files are not present, the layer
in your project may not work properly or display. Look up each of these file
types (ArcMap help) and indicate, in your lab blog, what they are.
2b) You have to move your files to the Instructor computer
in the front of the room to use Arc2Earth. You can either:
- Copy your entire ArcGIS folder to a flash drive
then sneakernet the files (walk them up to the instructor computer).
- ...or...
- Zip the entire ArcGIS folder using the Windows: In Windows Explorer, right mouse click
on your ArcGIS folder (in your personal course folder). Select send to
then compressed (zipped) folder. Best is if you put the compressed files
in your "cloud" space (Drive) associated with your OWU email account. Copy the file
to Drive on your computer, then download on the instructor computer. You can also
use your OWU web mail to email and download
the files onto the instructor computer.
- In the Geog 353 folder on the Instructor Computer, create a folder with
the exact same name as your folder on your computer and copy your ArcGIS folder into the folder with your name.
Open your .mxd file with your choropleth maps. If
any of the layers are not showing up let your instructor know.
Hint: Some illustrations from a tutorial related to this part of the project are
here
at the Making Maps book blog.
2c) The Arc2Earth menu should be visible in ArcMap. If not, from the
Customize menu then Toolbars select Arc2Earth (the first one listed). Open one of your .mxd
files.
2d) From the Export menu of Arc2Earth select Export All Layers (vector)....
- Make sure all the layers in the list are checked.
- Under the General tab add an Export Location. Navigate to your
personal folder on the computer, create a folder (KMZ), and then type in a file
name for your exported file.
- Under the Overlays tab un-check the Create Legend option if it is checked.
2e) Add time information to the layers:
- Click once on the name of the first of your map layers (change 1900-1910) in
the window on the left. In the Time Data tab select the Add time data to this layer
and the Use the value for entire layer option.
- Start Date for the 1900-1910 map should be 1/1/1900 at 12:00:00 and End Date
(check box before setting) should be 12/31/1909 at 12:00:00.
- Select the next map layer (1910-1920) and
set the time data the same, adjusting the years only (eg., 1910 and 1919 rather than 1900 and 1909),
and so on: set the time for all the layers (adjusting the years).
- Select Save... to save your options (so you can reopen and adjust and re-export
if needed). Save them in the folder with your KMZ files.
2f) Hit Export and you should see a window indicating progress of the export.
It should say Export completed successfully if all went well.
2g) Close out of Arc2Earth and minimize ArcMap.
2h) Open Google Earth.
- Under the File menu select Open and
navigate to and open your exported KMZ file. Google earth should zoom to your state
and you should see your first map, as well as a time line near the top of the window. Click on
the play button (clock icon with right facing triangle above the time line) to play the animation. Adjust
the settings, such as animation speed, by clicking on the clock icon to the left of
the time line.
Hint: Arc2Earth has other features that could add some interesting
functionality to your animated maps for Google Earth. Go back to Arc2Earth and Export all
layers and hit the Load... button to reload your options. Try some different options and
re-export.
2i) When all is working, export your second choropleth map (gains/losses) in the
same way. Check that the animation is ok. Turn off the first KMZ file before you open
the second in Google Earth. Then email your two KMZ files to yourself.
- Once back on your own computer, make a link on your HTML animation page
so your viewers can download the KMZ files, or create a new HTML page for the KMZ
files. To make the files downloadable, put them in your HTML folder, create a link
to the files on one of your web pages, and upload the KMZ files to the server.
When someone clicks on the link, the KMZ should download. Check that this works
from a different computer once you upload all the changes to your web pages. You
should explain what the KMZ files are and what to do with them on your web
pages.
- Try one more thing: check out the new Google
Earth Plugin which can be installed in common web browsers. You can then view
a Google Earth file (.kmz) on a web page. This is a tad bit silly for us, as we have
animated GIF versions of our maps. Alas, it is useful to know that you can view stuff
you have created for Google Earth on a web browser. You will have to install the plug-in
for this to work. Google to find "how to" examples. Create a new HTML page to view your
Google Earth KMZ file. Make sure to let your viewers know they have to download the
plug-in to see the map.
3. Something Else
Web mapping and virtual globes (like Google Earth) expand in capabilities almost on a
daily basis. You have a bunch of maps (choropleth, graduated symbol, dot) and have
animated them as GIF files and using Arc2Earth software.
Come up with one more significant alternative way to display some or all of your data. I
am leaving this up to you: the only requirement is that whatever you do should enhance
viewers understanding of your data. The more creative or interesting the better.
Each of you will create one more significant and different way of presenting your maps.
- using different software
- using different functions of the software you used in this lab
- or...whatever you can figure out.
Hint: Variable speed maps: Apply to your Choropleth,
Graduated Symbol, and Dot Density maps. One problem with animated GIFS is that the user
has no control over the speed of the animation. What is too slow for one viewer may be too
fast for another. It is easy to solve this problem by creating several animated GIFS of
the same maps. You may create one animated series that flips through the maps quickly,
another which flips through the maps at a moderate speed, and yet another that is very
slow. You then provide the viewer of your WWW pages the option to view the slow, medium,
or fast animation.
Hint: Google aboutdst the internets and see if you can find
some alternative ways (not animated GIF or Arc2Earth) to animate your maps. Flash maybe?
Hint: Use something other than Ulead's Gif Animator software
to make animated GIFs. There are many free-ware and share-ware software packages that
create animated GIF files, as noted in a previous hint on this page. Please don't
download anything on the GIS lab computers before checking with your instructor. Whatever
you use should provide different functionality than the GIF Animator software. Document
how to use the software and why it works well as an alternative or supplement to GIF
Animator.
Hint: Explore some alternative options in Arc2Earth and export
some additional maps.
Hint: If some of you fancy folks are using fancy CSS you might
be able to figure out different, fancy ways to display your maps.
You will finish this lab with:
- four animated GIF maps (using GIF Animator, for viewing on the Web) linked to and
viewable as part of your project HTML pages.
- two animated KMZ files (using Arc2Earth, for viewing in Google Earth) that viewers of
your project HTML pages can download.
You now have all the pieces to complete your project: spiff up all your pages,
focus on enhancing the usability of your pages, and ponder the presentation of your work
during the last week of classes.
E-mail: jbkrygier@owu.edu
...to Geog 353 Main Page and Course Description
...to krygier teaching page.
...to krygier top page.
OWU Home
OWU Geology and Geography Home