Geography 222 The Power of Maps
...to Geog 222 Main Page and Course Description
...to Geog 222 Syllabus
...to Geog 222 Course Schedule and Lecture Outlines
...to Geog 222 Laboratory Information and Student Projects
Paper-less Class & Digital Submissions Guide
Update: 10/22/09
Using Less Paper in Class
To this worthy end...
- Don't print the course syllabus or schedule. Check it online.
- Don't print the PDF "handouts" unless I tell you to. Read them on the computer screen.
- Take your own lecture notes, then refer to them and the online lecture
material while completing the take home exams.
- If you want your own copy of the lecture notes, save them as a "web
archive." This saves the page and all the graphics as a file you can
view on your computer (even if you are not connected to the internet.)
- Submit digital exercises and take home exams.
Digital Submissions
For each exercise or take-home exam:
- compile all text and graphics into a SINGLE file:
PDF (Portable Document Format) or Microsoft Word .doc / .docx
- Make sure the document format is correct: 1 inch margins, 12 pt. type, space-and-a-half line spacing.
- Double-check that your submission is complete before you send it: DON'T send me
version after version with material you forgot to include. If you realize you forgot something
revise your submission, send it, and bring a one dollar nuisance fee per corrected submission for me (next class meeting).
- name the file exactly like this (but with your last name and the appropriate exercise or exam name):
Krygier_Exer1.pdf or Krygier_Exer1.doc
- NEVER EVER remove the file extension (.pdf or .doc or .docx)
- Use an underscore ( _ ) rather than a blank in file names
- Email the file to me no later than 10am on the due date
- Make sure I respond indicating I got your file & I can read it
- Thinking you can submit a corrupted file to get a bit extra time to work on your submission?
Ha! I must have a readable copy of your file at the due date and time.
- please let me know if you need help.
The following information is organized assuming you will
- find your maps on the web or have a paper copy
- save those maps as a digital file
- bring the digital files into your word processor
- type your exercise
- save as a PDF or DOC
Graphics: Getting graphics off the Web
Most of you are familiar with graphics file formats like JPG and GIF and PNG. To keep
things simple, stick to these basic file formats. Other formats will work, and
feel free to experiment if you want to.
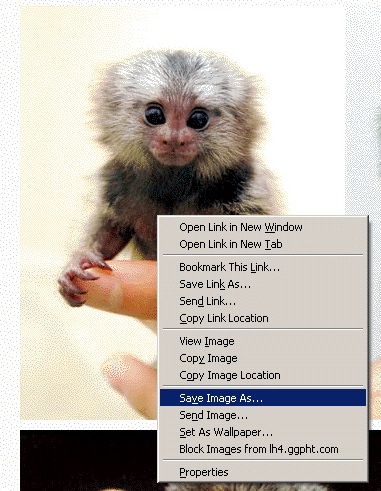
Windows Option 1: Click and drag the image to the
computer's desktop. Or right-mouse-click on the image. From the
pop-up window select Save Image As.... If the file is one of our
basic file formats (JPG, GIF, PNG) it will have the file extension .jpg
(or .jpeg), .gif, or .png.
- Navigate to and save the file
somewhere you will remember. If using the GIS Lab computers, save it in the
Geog 222 folder on the C drive, in a folder with your last name on it.
- When I do this the file does not have a file extension! This can
be for many reasons: best to use Windows Option 2 (below).
- When I do this the file extension is weird! You can look up file
extensions here, but if it isn't one
of the basic file formats it is best to use Windows Option 2 (below).
- I don't see the file extension at all! This may be Windows
trying to help you and instead making life hard for you. You need to adjust
Windows so it shows file extensions. Find Folder Options in Windows:
Start >> Settings >> Folder Options, then select View from the
options at the top of the window, and un-check the box next to the
text that says "hide file extensions for known file types." Hit the
Apply button and you should be able to see the file
extensions.
- Windows Option 2: Print Screen: This works with all
Windows computers.
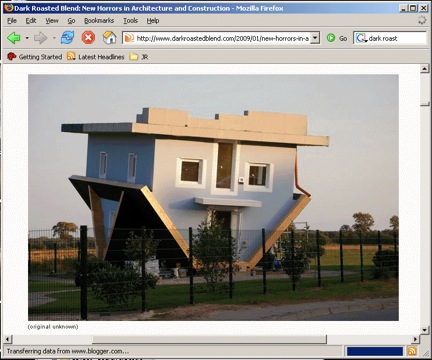
- 1. Get your map (or graphic) in a browser window, so you can see all
of it not any junk around it. Move the cursor is off the map and close
or minimize other windows.
- 2. Simultaneously hold down the ALT key + PRT SCRN key on the
keyboard for a few seconds. This captures all the graphics in the foremost window. [On
some computers, you must hold down the FUNCTION + PRT SCRN key]. You can also just
press the PRT SCRN key: this copies everything on the computer screen.
- 3. Open your word processor and Paste. Word (and most
word processors) allow you to crop the image to remove the browser
details around the edge of your image. Please do this!
- 4. If this does not work, open MS Paint (included free with
windows), and usually found in the Programs >> Accessories folder.
Create a new document then Paste and Save as a JPG,
GIF, or PNG somewhere you will remember. That file can be
imported into your word processor.
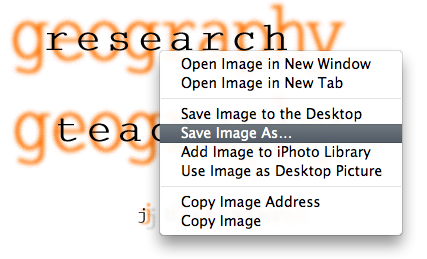
- Mac Option 1: Click and drag the graphic to your
computer's desktop. Or, if you have a two-button mouse,
Right-mouse-click on the image. From the pop-up window select Save
Image As.... If the file is one of our basic file formats (JPG, GIF,
PNG) it will have the file extension .jpg (or .jpeg), .gif, or
.png. Navigate to and save the file somewhere you will remember.
- When I do this the file does not have a file extension! This can
be for many reasons: best to use Mac Option 2 (below).
- When I do this the file extension is weird! You can look up file
extensions here, but if it isn't one
of the basic file formats it is best to use Mac Option 2 (below).
- Mac Option 2: Print Screen: This works with all Mac
computers.
- 1. Get your map in a browser window, so you can see all of it.
- 2. Simultaneously hold down the COMMAND key + SHIFT key + 4
key on the keyboard. A cross-hair cursor appears on the screen.
- 3. Move the cross-hair cursor to the upper left corner of the
map, click and drag to the lower right and release the
mouse button. A graphic file, in PNG format, will be created on your
desktop.
- 4. You can view the image in the Mac's Preview application and
save it as a JPG or GIF if you want.
- 5. Open your word processor and import the
image.
Graphics: Scanning paper maps & graphics
The AV Center in the basement of Beeghly Library has a scanner
and staff to help you use it. It is available until 9pm most eves.
In addition to the basic graphic file formats (JPG, GIF, PNG) you must be
familiar with file size when scanning paper maps. File size refers to the
dimensions (length, width) as well as the resolution.
Scanning software packages and scanners have many options, a few are important
for our purposes:
- Dimensions: typically just scan at 100% of original. You
can often scan a smaller (say 80%) or larger (say 130%) file of your paper
map.
- Color: most scanners offer options for scanning color photos,
black & white photos (grey scale images), and line drawings. Use the
setting for photos, scanning in black & white if your original is black &
white as the file size will be smaller.
- Resolution: IMPORTANT: You will be tempted to scan stuff at
too high a resolution: this creates files that are way bigger than you need, and that
may make it difficult to email your work to me. The resolution of the scanned file refers to how many dots per
inch the file contains. The higher the resolution the better the quality, but the
bigger the file. If you are going to use a scanned image on a computer screen (a web
page, blog, or PowerPoint presentation) scan it at 100 or 130 dots-per-inch. If you
are going to use a scanned image to print scan it at 200 to 300 dots-per-inch. For
Geography 222 scan your maps at 150 dots-per-inch. This looks pretty good but the
files are not too big.
- Orientation: if your scan is upside down, please find the tool in
the scanning software to flip it to the correct orientation.
- Scan your map and save the file somewhere you can find it. Then import
the image into your word processor. If you stick to our basic file formats,
the file should work on a PC or Mac.
Words & PDF Files
Most of you use Microsoft Word and all of you have access to it (in the
GIS Lab where our class is held or elsewhere on campus). There are other
options: Word Perfect and free, open-source software such as OpenOffice.
Choose a word processor that allows you to insert, import, or
paste in graphics files. Once in the word processor, the size and
resolution of a graphic can be adjusted.
- Open Word and from the Insert menu select Picture
and then From File. Navigate to your file and select it.
- Don't cut and paste graphics into Word. Use Insert instead.
Cutting and pasting leads
bigger file sizes and can cause the graphics to disappear when emailed or turned
into PDFs (which I do so I can comment on your work).
- Don't insert graphics upside down! If you scanned your graphic upside down,
use a graphic software package to flip it right side up.
- Click once on the graphic. You can grab the corners and scale
it to fit nicely on the page.
- Double-click on the graphic. A menu of options pops up. Feel free
to experiment to improve your graphic
- Word
Windows users VITAL: under the Picture tab is a button Compress.
Click this, then from under Change Resolution select Web/Screen.
This should compact your pictures so that they look good on the screen but
are not too big.
- Mac Users: there is no similar compress picture feature. You either need
to make sure you include low or medium resolution images, or you can save your
file and compress it. This compresses the entire file.
Anyone can open it by double clicking on it. Click once on your saved file
(on the desktop, or in a folder somewhere) to hi-lite it. While in the Finder,
from the File menu, select Compress.
Choose a word processor that allows you to save as or export a PDF
file. Windows WordPerfect and OpenOffice export PDFs. If you are using
a Mac, Word and OpenOffice export PDFs. Windows Word users can find free or inexpensive
Word to PDF converters on the web, or can just save as a .doc or .docx file.
Exporting a PDF from Word (Mac): click on the Convert to
Adobe PDF icon:

- ...or...
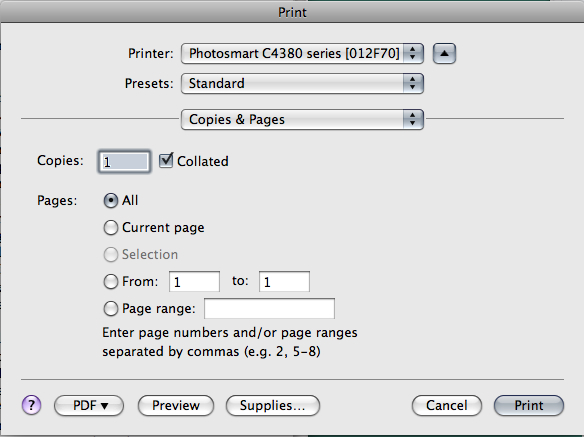
- Print... and click the PDF or Preview button. If
Preview, the Preview application opens and you can save the
file as a PDF.
Emailing the PDF/DOC as an Attachment
Email programs allow you to attach documents and email them.
If your file is large, it may be difficult to email. If your graphics are
created as above none of them should be too large. Talk to me if you are having
difficulty emailing your file to me.
Don't ever remove the file extension (.pdf, .doc, .docx) from your file: this will
garble the file. Best also to not use spaces in the file name, use an underscore (_)
instead.
I will email you when I receive and can successfully open your file. If you don't hear from
me please send another email (without the attachment) asking if I got the
file.
It is up to you to make sure I get the file.
E-mail: jbkrygier@owu.edu
...to Geog 222 Main Page and Course Description
...to krygier teaching page.
...to krygier top page.
OWU Home
OWU Geology and Geography Home